
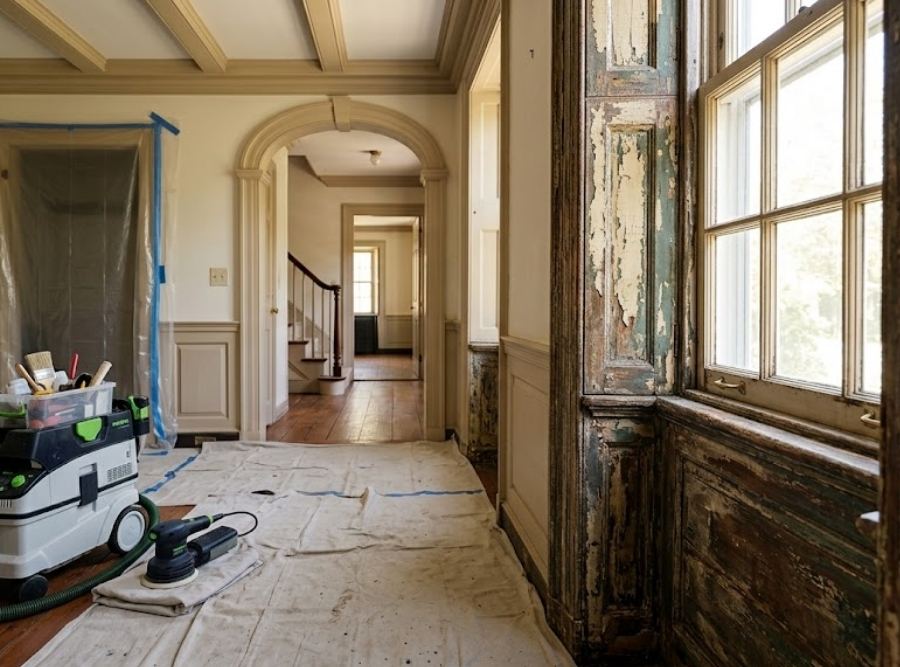
Is It Safe to Sand Old Paint in a Pre-1978 House?
No, you shouldn’t assume it’s safe to sand old paint in a pre-1978 house without first determining whether it may contain lead-based paint. Dry sanding can create fine lead-contaminated dust if lead is present, so the safest approach is to test suspect paint first and follow lead-safe renovation practices before disturbing older painted surfaces. This applies to homes throughout Stonington, Mystic, Old Saybrook, Essex, and other Connecticut shoreline communities where original woodwork, plaster, and trim have often been painted repeatedly for decades.
Why Does the Year 1978 Matter More Than How the Paint Looks?
You can’t tell whether paint contains lead just by looking at it — thick, cracked, or peeling paint isn’t necessarily lead-based, and smooth paint isn’t automatically safe. The reason 1978 matters is that lead-based residential paint was banned for consumer use in the United States that year. Homes built before then may have lead-containing paint beneath one or more newer layers, especially on original wood trim, window frames, doors, baseboards, crown molding, and porch railings.
That doesn’t mean every pre-1978 home definitely has lead paint, and it doesn’t mean every layer in an older home contains it, many homes have been renovated over the decades, with some surfaces stripped or repainted with modern products. The only reliable way to know is through testing.
Is the Paint Itself the Hazard, or Is It Something Else?
The bigger concern is usually dust, not the paint chips themselves. Intact, undisturbed lead paint is generally far less hazardous than paint that’s aggressively sanded or ground without precautions. Dry power sanding can generate large amounts of fine dust quickly, and if lead is present, those particles can settle on floors, furniture, window sills, HVAC registers, and other surfaces where they’re difficult to remove without proper cleaning methods.
Situations that deserve extra caution include:
- Sanding painted wood trim or baseboards in older homes
- Removing paint from original windows and doors
- Repairing plaster around painted moldings
- Restoring historic millwork with multiple paint layers
- Renovating children’s bedrooms or nurseries
- Projects in homes with young children or pregnant family members
What Common DIY Mistakes Increase Risk?
Several habits significantly increase risk if lead-based paint is present:
- Dry sanding painted surfaces before testing
- Using power sanders that create large amounts of airborne dust
- Sweeping renovation debris with a household broom
- Vacuuming paint dust with a standard vacuum instead of HEPA-equipped equipment
- Using high-temperature heat guns that may release hazardous fumes
- Failing to isolate the work area before disturbing painted surfaces
Painting fresh primer over loose, peeling coatings isn’t a fix either, intact lead paint can sometimes be managed through stabilization or encapsulation, but painting over paint that’s actively peeling or deteriorating rarely holds, since the failing layer underneath keeps losing adhesion and takes the new coat down with it.
Can You Paint Over Lead Paint, or Does It Have to Be Removed?
It depends on the paint’s condition, not a blanket rule. If lead-based paint is intact, well-adhered, and won’t be disturbed by the project, complete removal isn’t always necessary — encapsulation, covering properly prepared lead-based paint with an approved coating system, can be an appropriate management strategy, but only once the existing paint is confirmed stable. Loose, peeling, or deteriorated paint should never simply be covered and left as-is.
If a project requires disturbing painted trim, repairing damaged plaster, replacing windows, or restoring historic woodwork, that work should follow lead-safe renovation practices wherever lead may be present. Encapsulation on a stable surface and painting over an already-failing coating are two very different things — only the first is a recognized lead management approach.
How Do Professionals Approach Preparation in Older Homes?
Rather than starting with “how do we remove this paint,” a lead-safe approach starts by evaluating:
- The age of the home and its renovation history
- Whether the existing paint is deteriorating or intact
- Whether lead testing is appropriate before disturbing the surface
- Whether moisture is causing paint failure around windows or trim
- How dust can be contained if repairs are necessary
- Which preparation methods suit the condition of the substrate
This is about controlling the entire process, how dust is created, where it travels, how debris is collected, and how the work area is cleaned before the project is considered finished — not just wearing protective equipment during the sanding itself.
Why Does Old Paint Fail Even When Lead Isn’t a Factor?
Many paint failures in older homes come down to the coating simply reaching the end of its service life, regardless of lead content. Decades of sunlight, humidity, temperature swings, and everyday wear weaken paint film over time — exterior trim near Long Island Sound sees added stress from salt air and freeze-thaw cycles, while interior windows and doors wear down at contact points from repeated use.
Common signs older paint is failing include:
- Multiple paint layers cracking or peeling in sheets
- Thick paint buildup around windows and doors
- Chipping paint along frequently used trim
- Peeling near moisture-prone windows
- Exterior paint chalking or flaking after years of exposure
- Paint separating where earlier prep was inadequate
These are worth addressing regardless of lead status, since deteriorating paint lets moisture reach the wood or plaster underneath — left alone, a repaint can turn into a larger restoration involving damaged trim or plaster repairs.
If you’re planning to sand painted trim, refinish doors, or prepare surfaces in a pre-1978 Stonington-area home, the Simons Painting & Drywall team can help evaluate the paint’s condition and plan the right lead-safe preparation approach before any sanding begins.
Learn more on our Exterior Painting page.
Frequently Asked Questions About Sanding Old Paint
How do I know if my house has lead paint?
You can’t reliably tell by looking at the paint’s texture or condition, the only accurate way to know is through testing, since homes built before 1978 may have lead-based paint under newer layers regardless of how the surface appears. A professional test can confirm whether lead is present before any sanding or scraping begins.
Is it dangerous to sand painted trim in an old house if I don’t know whether it has lead paint?
Yes, it can be — dry sanding untested paint on a pre-1978 home creates a real risk of generating lead-contaminated dust if lead is present, since mechanical abrasion is what turns lead paint into an airborne hazard. Testing first is the safest way to know what precautions the project actually needs.
Do I have to remove all the old paint if my house has lead paint?
Not necessarily — if the lead-based paint is intact, well-adhered, and won’t be disturbed, encapsulating it with an approved coating system can be an appropriate approach instead of full removal. Paint that’s loose, peeling, or deteriorating needs to be addressed differently, since covering unstable paint doesn’t solve the underlying failure.
I already sanded some old paint without testing it first — what should I do now?
Stop further sanding, avoid dry-sweeping the area, and have the space professionally cleaned with HEPA-equipped equipment rather than a household vacuum, since regular cleaning methods can spread lead dust rather than remove it. If you’re concerned about exposure, testing the dust or paint and consulting a lead-safe renovation professional is a reasonable next step.

Shea Simons is the owner of Simons Painting & Drywall, a family-owned painting and refinishing company serving Connecticut Shoreline communities from East Lyme and Niantic to Old Saybrook, Madison, and Mystic. Shea and his team specialize in interior and exterior painting, drywall repair and installation, and fine refinishing work for cabinets, furniture, and custom walls. Homeowners along the shoreline know Shea’s crew for meticulous prep work and a finish built to hold up against coastal salt air and humidity.