How to Prepare Walls for Painting in an Old New England Home
Preparing walls in an old New England home starts with testing for lead-based paint if the home was built before 1978, then cleaning, repairing plaster or drywall damage, and priming appropriately before any finish coat goes on. Older Groton homes often have original plaster walls, decades of layered paint, and settling-related cracks that need a different approach than a newer drywall home — rushing straight to paint without addressing these factors is one of the most common reasons a paint job looks great initially and starts showing problems within a season.
Why Does an Older Home Need a Different Prep Approach Than New Construction?
Homes throughout Groton built in the Colonial, Federal, and early twentieth-century periods often have original plaster walls rather than drywall, layers of paint applied over many decades, and settling patterns that create cracks or uneven surfaces newer homes don’t have. Plaster and drywall behave differently under prep work — plaster is harder and more brittle, while drywall is more forgiving but more prone to dents and surface damage. Treating an older plaster wall the same way you’d treat modern drywall can lead to unnecessary damage or a repair that doesn’t hold.
Should You Test for Lead Paint Before Starting Prep Work?
Yes, if the home was built before 1978. Lead-based residential paint was banned for consumer use that year, and homes built earlier may have lead paint beneath newer layers, especially on trim, doors, window casings, and other painted architectural features. Testing before sanding or scraping matters because disturbing lead paint particularly through dry sanding can create fine lead-contaminated dust, which is a more serious concern than intact, undisturbed paint. If lead is confirmed, prep work should follow lead-safe practices: wet sanding or scraping rather than dry, careful containment of dust and debris, and cleanup with HEPA-equipped equipment rather than a standard vacuum.
How Do You Properly Clean Walls Before Painting an Older Home?
Older walls accumulate more than just surface dust — years of smoke, cooking residue, handprints, and general grime can affect how well new paint adheres. A thorough cleaning typically involves:
- Dusting or vacuuming walls to remove loose debris
- Washing with a mild cleaner to remove grease, grime, and residue
- Rinsing and allowing the surface to fully dry before any further work
- Spot-checking for mildew, particularly in bathrooms, basements, or rooms with historically poor ventilation
Skipping this step and painting over grimy or greasy walls is a common cause of poor paint adhesion, regardless of how good the paint itself is.
How Do You Repair Cracks and Damage in Old Plaster or Drywall?
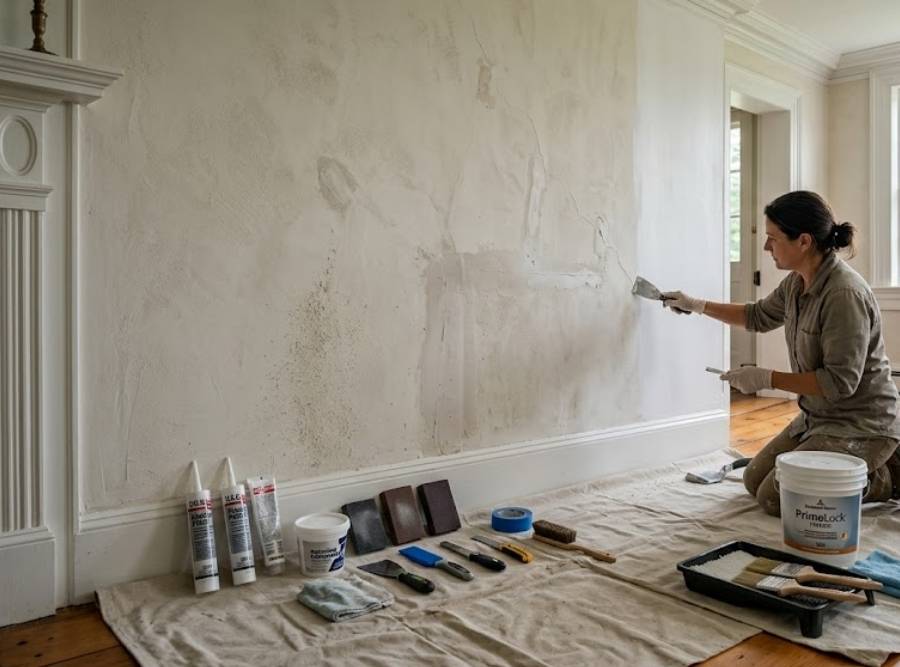
Older homes typically show one of two damage patterns: hairline cracks from decades of normal seasonal movement, or more significant separation where plaster has pulled away from its lath backing. Repair approaches differ:
- Hairline cracks: usually addressed with joint compound or a flexible patching material, feathered into the surrounding wall and sanded smooth once dry.
- Larger cracks or separated plaster: may need mesh tape or plaster washers to stabilize the area before patching, since simply filling a crack that’s still moving will likely fail again.
- Water-stained areas: should be addressed with a stain-blocking primer after the underlying moisture source is identified and corrected, not just painted over directly.
Rushing this step by only filling the visible crack, without addressing why it developed, is one of the more common reasons a repair reopens within a year.
What Priming Steps Matter Most in an Older Home?
Priming is especially important in older homes because of the range of surfaces often present on a single wall — original plaster, patched areas, and possibly newer drywall from a past renovation, all needing to accept paint consistently. Key priming considerations include:
- Priming any bare plaster, patched joint compound, or repaired sections to equalize porosity across the wall
- Using a stain-blocking primer over any water stains, smoke damage, or old adhesive residue
- Considering a bonding primer if the existing paint has a glossy or slick finish
- Allowing full drying time before the finish coat, since coastal humidity in Groton can extend drying time beyond what’s typical inland
Skipping primer on these mixed surfaces is a common reason patched areas show through the finish coat later, an effect sometimes called flashing.
What Should You Expect When Preparing an Older Groton Home Specifically?
Groton’s coastal location means humidity can affect drying times for both prep materials and finish paint, so it’s worth building extra time into a project schedule compared to a drier inland town. Older Groton homes with original plaster also benefit from a gentler touch during repair — aggressive sanding or scraping can damage plaster that’s difficult to match if larger sections need replacement. Taking the time to properly assess and prep an older wall generally costs less over the life of the paint job than rushing straight to the finish coat.
If you’re preparing to paint walls in an older Groton home and want to make sure plaster repairs, priming, and prep work are handled correctly, the Simons Painting & Drywall team can assess your walls and recommend the right approach.
Learn more on our Drywall Repair & Installation page, or see our Groton location page.
Frequently Asked Questions About Preparing Walls in Older Homes
Do I need to test my walls for lead paint before repainting an old Groton home?
If your home was built before 1978, testing is worth doing before any sanding or scraping, since lead-based paint was banned for consumer use that year and older homes may have it beneath newer layers. Intact paint that isn’t being disturbed is generally lower risk, but any sanding or scraping should follow lead-safe practices until testing confirms otherwise.
Why does my old plaster wall keep cracking in the same spot after I repair it?
If the underlying plaster or framing is still moving seasonally, filling just the visible crack without stabilizing the area first often leads to the same crack reopening. Using mesh tape or plaster washers to address the underlying movement generally produces a more lasting repair than joint compound alone.
Is priming more important in an older home than a newer one?
Often yes, since older homes frequently have a mix of original plaster, patched areas, and possibly newer drywall on the same wall, all of which absorb paint differently without a proper primer coat. Skipping primer on these mixed surfaces is a common reason patches or repairs show through the finish paint later.
Does Groton’s coastal climate affect how long wall prep takes before painting?
Yes, humidity along the Groton coastline can extend drying times for joint compound, primer, and paint compared to a drier inland location. It’s worth building extra time into your project schedule rather than rushing to the next step before surfaces are fully dry.

Shea Simons is the owner of Simons Painting & Drywall, a family-owned painting and refinishing company serving Connecticut Shoreline communities from East Lyme and Niantic to Old Saybrook, Madison, and Mystic. Shea and his team specialize in interior and exterior painting, drywall repair and installation, and fine refinishing work for cabinets, furniture, and custom walls. Homeowners along the shoreline know Shea’s crew for meticulous prep work and a finish built to hold up against coastal salt air and humidity.